Jingle/SIP setup proof of concept
This tutorial will show you how to configure MongooseIM, Routr (a SIP server) and client applications to demonstrate how the Jingle/SIP integration works.
Prerequisites
We are going to use the following open source software:
-
MongooseIM - https://github.com/esl/MongooseIM
- see How-to-build for details on building.
It's important to remember to run the configuration script with
with-jingle-sipflag set:tools/configure with-jingle-sip. Without this, third party dependencies required by the Jingle/SIP translator will not be included in the release.
- see How-to-build for details on building.
It's important to remember to run the configuration script with
-
Routr (SIP server) - https://routr.io
- I recommend downloading binaries for your system from https://routr.io/docs/getting-started-installation.html
- Jitsi (XMPP and SIP client application) - https://desktop.jitsi.org
- Otalk - web based XMPP client - https://github.com/otalk/otalk-im-client
- Folow the instructions on otalk-im-client#installing to run it
We will use 2 users xmpp.user@xmpp.example and sip.user@sip.example.
Configuring Routr
First the domain sip.example needs to be added to domains served by Routr.
To do it, paste the following content to config/domains.yml in the directory where Routr was:
- apiVersion: v1beta1
  kind: Domain
  metadata:
    name: SIP domain
  spec:
    context:
      domainUri: sip.example
Then the sip.user@sip.example needs to be added to config/agents.yml like below:
- apiVersion: v1beta1
  kind: Agent
  metadata:
    name: SIP User
  spec:
    credentials:
      username: 'sip.user'
      secret: '1234'
    domains: [sip.example]
Now Routr can be started with
./routr
If all goes well we'll see the following output:
[INFO ] Starting Routr
[INFO ] Listening  on 10.152.1.27:5060 [udp]
[INFO ] Listening  on 10.152.1.27:5060 [tcp]
[INFO ] Starting Location service
[INFO ] Starting Registry service
[INFO ] Starting Restful service (port: 4567, apiPath: '/api/v1beta1')
It is important to remember the IP address as it'll be used in next point.
A side note
In Routr's logs you may see messages like
[WARN ] Unable to register with Gateway -> sip.provider.net. (Verify your network status)
or
[ERROR] java.lang.RuntimeException: javax.sip.header.TooManyHopsException: has already reached 0!
They can be ignored for the purpose of the tutorial.
Configuring /etc/hosts
In my case the IP reported by Routr was 10.152.1.27.
Now we need to use this to update /etc/hosts file like below:
10.152.1.27 sip.example xmpp.example
Configuring MongooseIM
At this point I assume that MongooseIM was built with make rel, that it is running and the current working directory is _build/prod/rel/mongooseim.
Similar to Routr, MongooseIM also needs to know which hosts to server.
Please replace the default host defined in file etc/ejabberd.cfg in line
{hosts, ["localhost"] }.
to:
{hosts, ["xmpp.example", "sip.example"] }.
Now we need to enable mod_jingle_sip, please add the following line in modules list (somewhere around line 740 in the same file)
{mod_jingle_sip, [{proxy_host, "sip.example"}]},
More details on MongooseIM configuration you can find in Basic Configuration and in Modules configuration
Now we are registering both users in MongooseIM by calling the following commands:
bin/mongooseimctl register xmpp.user xmpp.example test_pass
bin/mongooseimctl register sip.user sip.example test_pass
Yes, we need to have the sip.user@sip.example registered in MongooseIM.
This is needed because a Jingle call can be initiated by a regular XMPP client only when the app knows the other user's full JID.
The easiest way to achieve that is to exchange presence information between these 2 users.
This can happen automatically if 2 xmpp users have each other in the roster.
The roster can be set by us with the following commands:
bin/mongooseimctl add_rosteritem sip.user sip.example xmpp.user xmpp.example xmpp.user none both
bin/mongooseimctl add_rosteritem xmpp.user xmpp.example sip.user sip.example sip.user none both
Adding users to Jitsi
Now the sip.user@sip.example has to be added to Jitsi app.
When the app is opened for the first time it will display a window to configure the user.
Later users can be configured from the Preferences page.
Adding a SIP user
In order to add a user who connects to the SIP server we need to choose the SIP protocol from the available networks in Jitsi.
In the SIP id field we put sip.user@sip.example and in the Password field we put 1234 as in the agents.yml file.
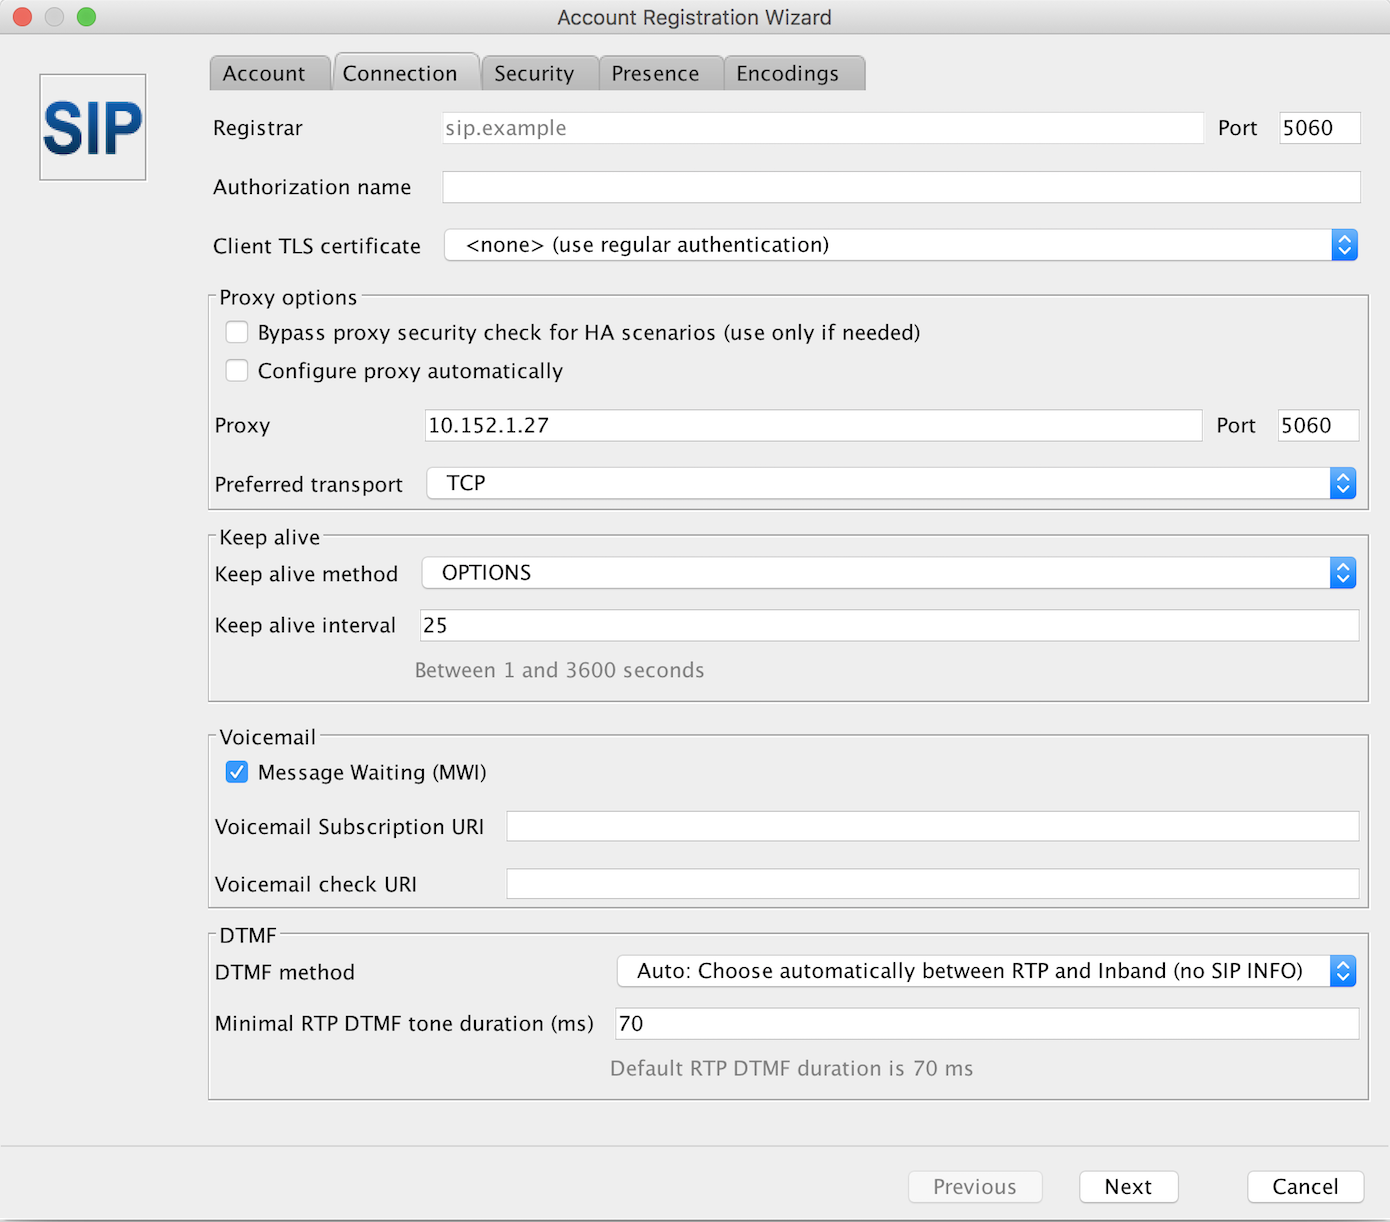
Now we need to switch to Advanced options and go to the Connection tab.
Here we need to unselect the Configure proxy automatically and put the IP of our Routr server, port number 5060 and TCP as the preferred transport.
Adding an XMPP user
Now we have to add sip.user@sip.example to Jitsi's XMPP network in order to connect this user to MongooseIM over XMPP.
It's very similar to adding a user to Jitsi's SIP network, the only difference is the password,
for the XMPP conection it's test_pass as set when registering the user in MongooseIM.
Here we also need to go to the Advanced window and the Connection tab in order to put the IP addres (the same as before) in the Connect Server field.
Remember to check the Override server default options box.
To connect sip.user@sip.exmple to MongooseIM over XMPP is to cheat Jingle a bit, so that the client app for user sip.xmpp@xmpp.example can start the Jingle call.
When Jitsi connects this user, it will likely display a warning about the server's certificate.
This is because by default MongooseIM is configured with a freshly generated, self-signed certificate.
We can click Continue anyway button in order to proceed.
Adding user to Otalk
Please follow the instructiond on https://github.com/otalk/otalk-im-client#installing in order to compile and run the app. If all goes well, you should see the following message printed in the console:
demo.stanza.io running at: http://localhost:8000
This means that the app is hosted on http://localhost:8000.
At this point I also recommend opening https://localhost:5285/ws-xmpp in the same browser. This endpoint works correctly only for WebSocket connections but most probably you will be prompted about the certificate. This is again due to the self-signed certificate. We need to add an exception for this certificate in order to successfully connect from Otalk.
Now let's open http://localhost:8000 where the Otalk app is hosted.
In the Log in section put xmpp.user@xmpp.example in the JID field and test_pass in the Password filed.
The default WebSocket endpoint in the WebSocket or BOSH URL field needs to be changed to:
wss://localhost:5285/ws-xmpp
Mind the wss protocol, Otalk will not connect the user over WebSockets if for example https is put in the field.
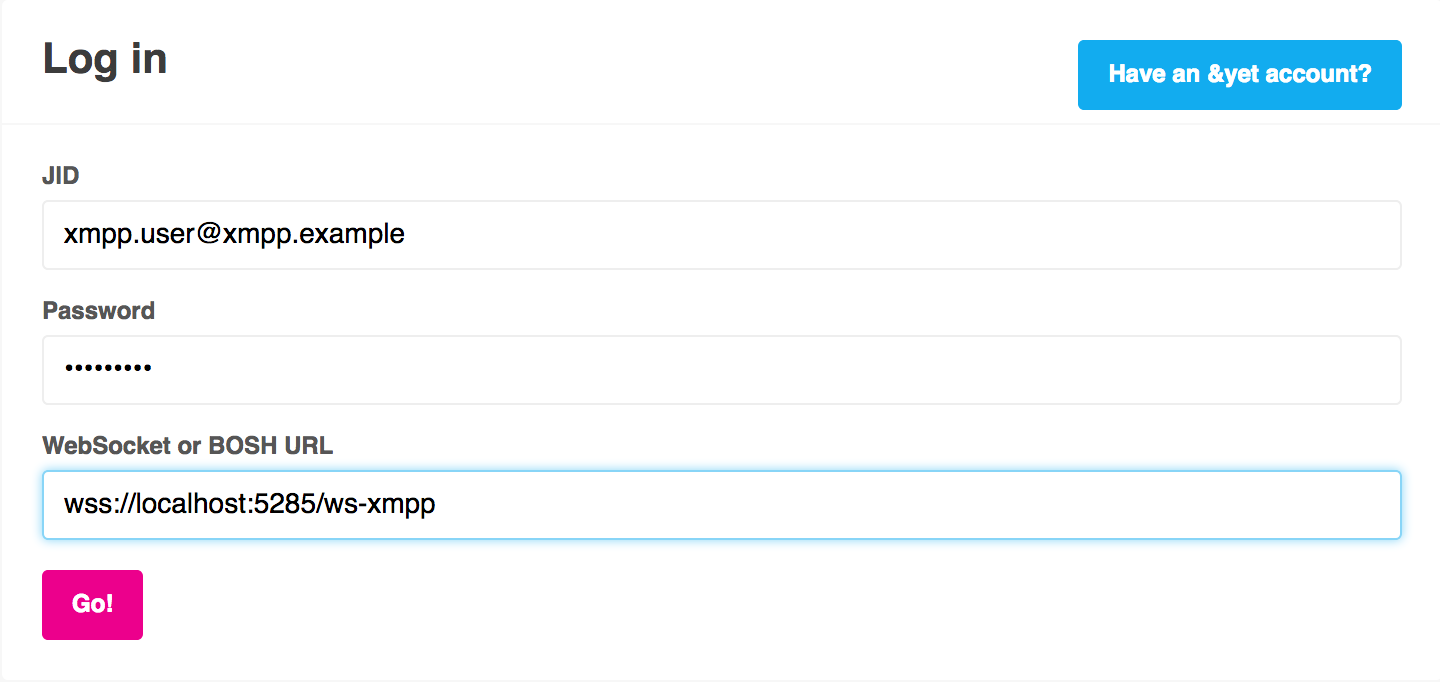
Now we can hit the Go! button and the xmpp.user@xmpp.example will connect to MongooseIM.
Making a call
On the left side we can see that the user already has sip.user@sip.example in the roster and there should be a green dot indicating that the user is online.
When we click on the contact, the Call button should appear allowing us to initiate the call.
In Jitsi, the following window should pop up:
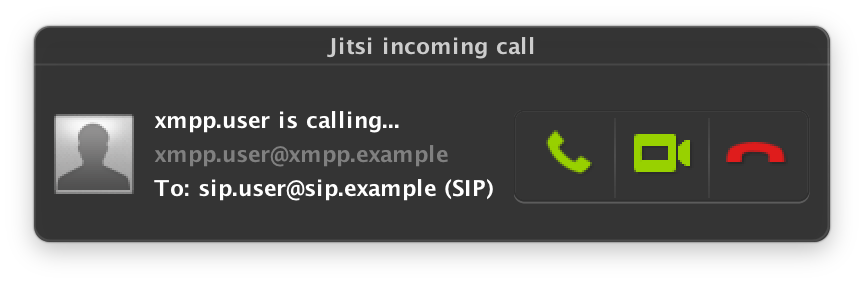
Behind the scene the following SIP request was send from MongooseIM to Routr.
INVITE sip:sip.user@sip.example:5060 SIP/2.0
Via: SIP/2.0/TCP localhost:5600;rport;branch=z9hG4bK1HMB3o-3mbahM
From: xmpp.user <sip:xmpp.user@xmpp.example>;tag=aVEBue
To: sip.user <sip:sip.user@sip.example>
Call-ID: ae602f16-d57d-4452-b83e-36e54bb6d325
CSeq: 159913767 INVITE
Max-Forwards: 70
Content-Length: 2243
Contact: <sip:xmpp.user@localhost:5600;ob;transport=tcp>;+sip.instance="<urn:uuid:f45950f1-70cd-229d-6c2b-8c85903ce14e>"
Content-Type: application/sdp
Supported: outbound,100rel,path
Allow: PRACK,INVITE,ACK,CANCEL,BYE,OPTIONS,INFO,UPDATE,SUBSCRIBE,NOTIFY,REFER,MESSAGE

v=0
o=- 1531401304 1531401304 IN IP4 127.0.0.1
s=nksip
c=IN IP4 127.0.0.1
t=0 0
a=group:BUNDLE sdparta_0 sdparta_1
m=audio 1436 UDP/TLS/RTP/SAVPF 109 9 0 8 101
a=sendrecv
a=mid:sdparta_0
a=setup:actpass
a=fingerprint:sha-256 44:84:41:8F:B7:A3:B7:37:BA:00:26:5E:B1:D6:AB:D0:56:56:CF:53:F2:05:DB:99:DE:D4:1C:63:A4:68:58:EA
a=ice-pwd:49ad0f02b4f5181c9af3c4006575e071
a=ice-ufrag:a3cc96e2
a=rtcp-mux
a=extmap:3 urn:ietf:params:rtp-hdrext:sdes:mid
a=extmap:2/recvonly urn:ietf:params:rtp-hdrext:csrc-audio-level
a=extmap:1 urn:ietf:params:rtp-hdrext:ssrc-audio-level
a=rtpmap:109 opus/48000/2
a=fmtp:109 useinbandfec=1;stereo=1;maxplaybackrate=48000
a=rtpmap:9 G722/8000
a=rtpmap:0 PCMU/8000
a=rtpmap:8 PCMA/8000
a=rtpmap:101 telephone-event/8000
a=fmtp:101 0-15
a=ssrc:1698222108 cname:{ce7fa171-069e-db4f-ba41-cfa4455c1033}
a=ssrc:1698222108 msid:{788b64bb-c4fc-b644-89b0-89f69c78f8b0} {2ba61f91-abca-3e48-84b7-85b57e8fdfb5}
m=video 1031 UDP/TLS/RTP/SAVPF 120 121 126 97
a=sendrecv
a=mid:sdparta_1
a=setup:actpass
a=fingerprint:sha-256 44:84:41:8F:B7:A3:B7:37:BA:00:26:5E:B1:D6:AB:D0:56:56:CF:53:F2:05:DB:99:DE:D4:1C:63:A4:68:58:EA
a=ice-pwd:49ad0f02b4f5181c9af3c4006575e071
a=ice-ufrag:a3cc96e2
a=rtcp-mux
a=extmap:5 urn:ietf:params:rtp-hdrext:toffset
a=extmap:4 http://www.webrtc.org/experiments/rtp-hdrext/abs-send-time
a=extmap:3 urn:ietf:params:rtp-hdrext:sdes:mid
a=rtpmap:120 VP8/90000
a=fmtp:120 max-fr=60;max-fs=12288
a=rtcp-fb:120 goog-remb
a=rtcp-fb:120 ccm fir
a=rtcp-fb:120 nack pli
a=rtcp-fb:120 nack
a=rtpmap:121 VP9/90000
a=fmtp:121 max-fr=60;max-fs=12288
a=rtcp-fb:121 goog-remb
a=rtcp-fb:121 ccm fir
a=rtcp-fb:121 nack pli
a=rtcp-fb:121 nack
a=rtpmap:126 H264/90000
a=fmtp:126 packetization-mode=1;level-asymmetry-allowed=1;profile-level-id=42e01f
a=rtcp-fb:126 goog-remb
a=rtcp-fb:126 ccm fir
a=rtcp-fb:126 nack pli
a=rtcp-fb:126 nack
a=rtpmap:97 H264/90000
a=fmtp:97 level-asymmetry-allowed=1;profile-level-id=42e01f
a=rtcp-fb:97 goog-remb
a=rtcp-fb:97 ccm fir
a=rtcp-fb:97 nack pli
a=rtcp-fb:97 nack
a=ssrc:823938224 cname:{ce7fa171-069e-db4f-ba41-cfa4455c1033}
a=ssrc:823938224 msid:{788b64bb-c4fc-b644-89b0-89f69c78f8b0} {a7f87c8d-6002-fd4c-badb-13383c759e48}
And Routr sent the Ringing response code to MongooseIM as soon as the Jitsi app displayed the incoming call window:
SIP/2.0 180 Ringing
CSeq: 159913767 INVITE
Call-ID: ae602f16-d57d-4452-b83e-36e54bb6d325
From: "xmpp.user" <sip:xmpp.user@xmpp.example>;tag=aVEBue
To: "sip.user" <sip:sip.user@sip.example>;tag=9b4c72a3
Via: SIP/2.0/TCP localhost:5600;rport=54071;branch=z9hG4bK1HMB3o-3mbahM;received=10.152.1.27
Contact: "sip.user" <sip:sip.user@10.152.1.27:53697;transport=tcp;registering_acc=sip_example>
User-Agent: Jitsi2.10.5550Mac OS X
Content-Length: 0
Summary
The example above showcases how you can use Jingle/SIP switch with the available open source software. Sonetel, who are this feature's sponsor, operate on a slightly different use case and utilize more of the functionality with their proprietary software. Current implementation makes following assumptions:
- The peer-to-peer stream is always encrypted.
This means that MongooseIM expects element
<fingerprint>as described in XEP-0320 to be in the content description. Not every open source XMPP client supporting Jingle supports this encryption. - MongooseIM expects that the
200 OKresponse contains at least one ICE candidate to set the peer-to-peer connection up.
This makes the current implementation a bit limited, but on the other hand the basic integration between XMPP and SIP world is already there. Based on the current state it can be improved and extended if needed.